はじめに
VisualStudioをIDEとしてSpringBootのサンプルアプリの動作確認までの流れを説明しています。
バージョンは以下なので同様の環境の方は参考にしてください。
- Windows 10
- Visual Studio Code 1.42
事前準備
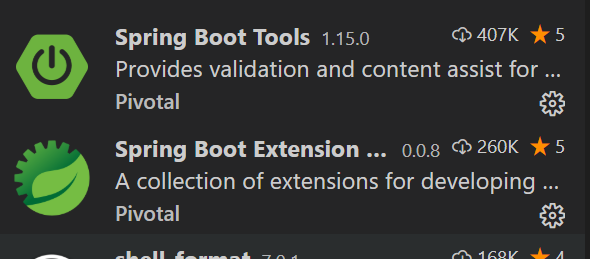
以下の2つは事前にVSCode上でインストールしてください。
SpringBootのプロジェクトを作成する
Java Overviewにある「Create Spring Boot project 」を押下すると
- Maven Project / Gradle Project の選択を求められるので今回はビルドシステムとして「Maven」を選択し
- Input group id for your project を求められるので任意の値(またはデフォルト)を入力し
- Input Artifact id for your project を求められるので任意の値(またはデフォルト)を入力し
- Specify Spring boot version を選択し、最後にディレクトリ名を選択
今回はディレクトリ名を「sptest」、グループID等はデフォルトの値としました。以下のようなファイル群が自動的に用意されます。
sptest/
└── demo
    ├── HELP.md
    ├── mvnw
    ├── mvnw.cmd
    ├── pom.xml
    ├── src
    │   ├── main
    │   │   ├── java
    │   │   │   └── com
    │   │   │       └── example
    │   │   │           └── demo
    │   │   │               └── DemoApplication.java
    │   │   └── resources
    │   │       └── application.properties
    │   └── test
    │       └── java
    │           └── com
    │               └── example
    │                   └── demo
    │                       └── DemoApplicationTests.java
    └── target
        ├── classes
        └── test-classes
Spring Bootを起動する
画面左側に以下のようなダッシュボード機能があるので「Start」させます。
そうするとデバック画面に以下のような出力があります。
  .   ____          _            __ _ _
 /\\ / ___'_ __ _ _(_)_ __  __ _ \ \ \ \
( ( )\___ | '_ | '_| | '_ \/ _` | \ \ \ \
 \\/  ___)| |_)| | | | | || (_| |  ) ) ) )
  '  |____| .__|_| |_|_| |_\__, | / / / /
 =========|_|==============|___/=/_/_/_/
 :: Spring Boot ::        (v2.2.4.RELEASE)

..  INFO 23772 --- [           main] com.example.demo.DemoApplication         : Starting DemoApplication on XX with PID 23772 (C:\Users\XX\sptest\demo\target\classes started by XX in c:\Users\XX\sptest\demo)
..  INFO 23772 --- [           main] com.example.demo.DemoApplication         : No active profile set, falling back to default profiles: default
..  INFO 23772 --- [           main] com.example.demo.DemoApplication         : Started DemoApplication in 1.332 seconds (JVM running for 3.246)
Controllerを用意する
今回は/helloとURLを叩くと「HelloWorld」と表示させるサンプルアプリを作成します。
DemoApplication.javaがある同じディレクトリ配下に「Helloworld.java」を用意して以下をコピペしてください。
package com.example.demo;
import org.springframework.boot.autoconfigure.EnableAutoConfiguration;
import org.springframework.stereotype.Controller;
import org.springframework.web.bind.annotation.RequestMapping;
import org.springframework.web.bind.annotation.ResponseBody;
@Controller
@EnableAutoConfiguration
public class Helloworld {
    @RequestMapping("/hello")
    @ResponseBody
    private String hello(){
        return "Hello World!";
    }
}
import文のエラーを解消する
デフォルトでは以下のエラーが出ます。
The import .. cannot be resolved vscode
今回利用している「import org.springframework.web...」部分にパスが通っていないことが原因です。
ここを解消するために以下文言を pom.xml に追記してください。
追加する場所はdependenciesの間です。
<dependency>
<groupId>org.springframework.boot</groupId>
<artifactId>spring-boot-starter-web</artifactId>
</dependency>
これによってSpring BootのWebアプリケーションライブラリの利用を宣言できます。
初めての修正であれば以下のような文言が画面に出ますが、その場合は「OK」を選択してください。
A build file was modified. Do you want to synchronize the Java classpath/configuration?
ビルドする
エラーがないかどうかの確認のためにMAVEN PROJECTSにある「demo」を右クリックして「validate」を行います。
ターミナルにて「BUILD SUCCESS」が表示されれば成功です。
PS C:\Users\XX\sptest\demo> & "c:\Users\XX\md" validate -f "c:\Users\XX\sptest\demo\pom.xml"
...
[INFO] BUILD SUCCESS
...
動作確認
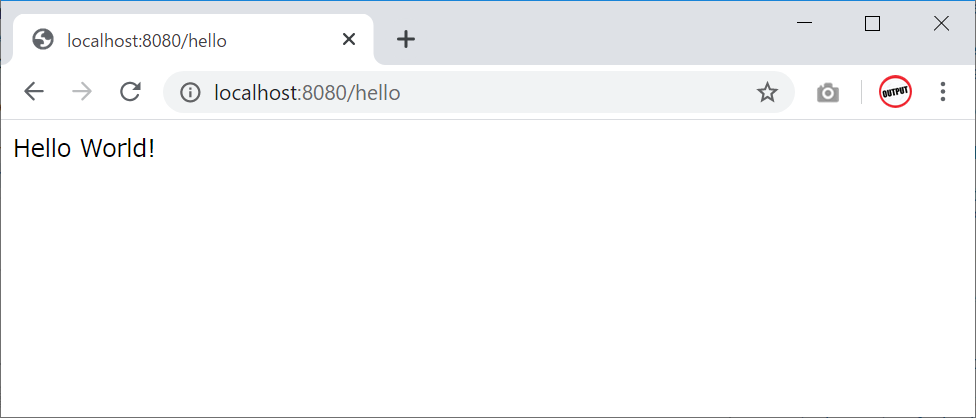
demoを「Start」して起動している状態でブラウザにて以下のURLを入力すると
http://localhost:8080/hello
以下のように表示されます。
curlコマンドでも同様の結果が確認できます。
$ curl http://localhost:8080/hello
Hello World!
終わりに
VisualStudioCodeにおけるSpringBootのサンプルアプリ動作のチュートリアル記事がなかったので、今回はメモしておきました。
ご参考になれば幸いです。
